BlackFriday Sale - $1000 OFF EACH COURSE

USE CODE: BLACKFRIDAY2025

Be the first to know

Sign up to get our tip of the month as well as case reviews, product updates, launch announcements and more by joining my newsletter.  We have some exciting products & courses come up.

You're signing up to receive emails from Dr. Tejas Patel

Resource Guide by Virtual Veneer Training

Dr. Patel has written several articles on Veneer Training and Social Media.  Sign up for our newletter to have helpfule articles  delivered to your inbox every few weeks

Why Is Case Selection the Secret to Veneer Success?

The Foundation of Every Veneer Case

In cosmetic dentistry, clinical skill and artistry are essential but the true foundation of a successful veneer case begins long before the handpiece is ever picked up. Proper case selection determines whether a patient’s expectations can be met, and whether their long-term esthetic and functional results will hold up beautifully over time.

Dentists who master this stage consistently deliver predictable, high-quality outcomes. Those who skip or rush it often face complications in shade, shape, or function—problems that could have been avoided with stronger diagnostic insight from the start.


Evaluating the Ideal Veneer Candidate

When evaluating a potential veneer case, attention to detail is key. Factors like occlusion, enamel thickness, lip dynamics, and patient motivation play major roles in whether veneers are the right solution.

A thorough esthetic evaluation should include:

  • Midline and incisal edge analysis

  • Gingival symmetry and display

  • Smile line curvature

  • Facial proportion and tooth shape harmony

Equally important is communication, educating the patient about what veneers can and cannot do ensures alignment of goals and builds trust throughout the treatment process.


Why Proper Selection Saves Time and Enhances Results

Selecting the right case saves chair time, reduces remakes, and enhances patient satisfaction. It also allows for more accurate treatment planning and smoother lab communication.

This is why Dr. Tejas Patel’s Veneer Blueprint Course emphasizes case selection as one of the most critical early steps in the veneer workflow. The course offers detailed checklists, case examples, and proven systems that help dentists identify the ideal veneer candidates and avoid common pitfalls.

Learn the Full Veneer System

Dentists looking to strengthen their confidence and consistency with porcelain veneers can explore The Veneer Blueprint Course, Dr. Patel’s comprehensive online program that breaks down every stage of the veneer process, from case selection to final delivery.

What Are No Prep Porcelain Veneers and Prepless Porcelain Veneers?

So what are no prep veneers? No Prep Veneers are Porcelain Veneers that are thin shells of porcelain that are bonded to the front surfaces of the teeth to improve the color, shape, size, symmetry, straightness, and fullness of the smile. True No Prep Veneers means that there are no alterations to the tooth structure so the veneers go directly over the natural teeth. No Prep Veneers are an additive procedure to the teeth. If you’re a Dentist and want to learn how to do veneers, check out https://drtejaspatel.podia.com/ to find out more about my Veneer Courses

How are No Prep Porcelain Veneers and Prepless Porcleain Veneers Used?

ISo how are No Prep and Prepless veneer used? Both No Prep and Prepless Porcelain Veneers are Used to improve the appearance of someone's smile. They are both conservative options and minimally or non invasive. Here’s some ways that No Prep and Prepless Veneers can improve a smile: They can be used to add length to the teeth to make teeth that are short or small longer and bigger. They can be used to add volume or thickness to teeth that need to be built out or to help broaden a narrow smile. They can be used to whiten teeth or change the color of the teeth in a smile. They can be used to make teeth appear straighter and improve the arch form or alignment of teeth when there is minimal shifting of the teeth. They can be used to improve the symmetry of the teeth in a smile as well….. And so much more. When doing a smile makeover using No Prep or Prepless Porcelain Veneers, we are often doing 8 to 10 of the upper teeth as our treatment. If you’re a Dentist and want to learn how to do veneers, check out https://drtejaspatel.podia.com/ to find out more about my Veneer Courses. In my Veneer Blueprint Course we review: How to do porcelain veneers, treatment planning, case selection, case presentation, labs, material selection, veneer reduction requirements, veneers and occlusion, smile design, veneer preparation steps and sequence, recommended burs, no prep veneers, prepless veneers, minimal prep veneers, live video of veneer preparation, veneer temporization and veneer cementation, dealing with complications and troubleshooting, laminate veneer cases from a to z, case reviews, marketing, dental photography, and so much more!

What Are Prepless Porcelain Veneers?

So what are prepless veneers? Prepless Veneers are Porcelain Veneers that are thin shells of porcelain in in that are bonded to the front surfaces of the teeth to improve the color, shape, size, symmetry, straightness, and fullness of the smile. Prepless Veneers means that there is some enameloplasty, contouring, or alterations made to the tooth structure or enamel prior to the veneers going over the teeth. Again, to clarify this contouring is limited to the enamel surface and done strategically and conservatively. Prepless Veneers also are a mostly additive procedure to the teeth. Here are some similarities between no prep veneers and prepless veneers… When doing Both No prep and Prepless Porcelain veneer restorations, we are not drawing any margins onto the teeth. Also, in many cases, the patient does not wear temporaries in the interim time between their first visit and second visit while the permanent veneers are being made by the lab. If you’re a Dentist and want to learn how to do veneers, check out https://drtejaspatel.podia.com/ to find out more about my Veneer Courses. In my Veneer Blueprint Course we review: How to do porcelain veneers, treatment planning, case selection, case presentation, labs, material selection, veneer reduction requirements, veneers and occlusion, smile design, veneer preparation steps and sequence, recommended burs, no prep veneers, prepless veneers, minimal prep veneers, live video of veneer preparation, veneer temporization and veneer cementation, dealing with complications and troubleshooting, laminate veneer cases from a to z, case reviews, marketing, dental photography, and so much more!

6 THINGS DENTISTS NEED TO GET STARTED ON SOCIAL MEDIA

We’ve built a huge following on Social Media.  Here are a few things you need to clarify to Get Started In Your Practice. 
  • Need a Platform
  • Need to collect content
  • Need ideas and your themes
  • Need to put it together
  • Need to post it
  • Need to repeat this consistently
If you’re wanting to learn how to grow your dental practice through social media, check out our online social media masterclass at https://drtejaspatel.podia.com/veneer-masterclass

15 TIPS FOR DOING BETTER VENEERS

1. Teamwork Makes the Dreamwork Build a team of all stars. Teach your team about cosmetic dentistry and veneers, show them what’ s possible, and get them involved. Having a solid team that believes in what you do and can support you and your patients is essential. I couldn’t do what I do without my team. 

2. Choose the Best Lab Working with an awesome cosmetic lab is extremely important. To be successful with porcelain veneers you must work with a high quality lab and an experienced ceramist. As with anything, you get what you pay for. Be prepared to pay high-end fees for great results. It is worth it to help save headaches and reduce chair time, not to mention have happier patients who refer you. I recommend Danny Evanson with Reliance Dental Designs Lab and Bob Clark with Williams Dental Lab. 

3. Show What is Possible Photography is key for building a cosmetic practice and doing more veneers. Taking pictures of a patient’ s smile and imaging them with an app like the DSDApp by Coachman or another app is helpful. Another option is to take a picture with an iPad® or iPhone®, and use markup to edit and draw on the picture to show the patient the changes you plan to make. 

4. Lead with the Centrals Measuring the length of the central incisors is a daily activity for me. The goal of this is to always be in control and mindful of the overall size of the teeth, as the centrals are the basis for the entire smile. I use a Boley Gauge every day and in every case. I use an old school analog gauge, but a digital one will work as well. I use it to measure the pre-op length, gum tissue alterations, the desired length for the wax up, to verify the length of the temps, and then to cross check the length of the permanent porcelain veneers. There are many factors that go into deciding the final length of the veneers, but for me it always starts with measuring the upper centrals and referencing that. 

5. Document With Images I use a digital Nikon camera with dual flashes that was preset and purchased through PhotoMed. It’ s great for headshots and close up pictures. We also use our iPhone® everyday for photos and to capture video. Do they want pointy canines Do they want rounded corners Do they prefer open or closed embrasures What kind of overall look they are going for If they like the centrals and laterals to be level Through photos and video, you can also document each step of every one of your cases. If your patient consents and approves (either full face or just their close up smile) this visual content can be used for social media. Use these images for yourself, to review your cases, for your lab, for your patients, and for your future patients. 

6. Start with a Blueprint for Success Diagnostic wax-ups from our lab are essential for success in our veneer cases. When designing a smile, you have to have a roadmap and a solid direction towards your destination, wax-ups ensure you know where you’re going with your design and great-looking temps. In general, I get a wax-up for any smile makeover I do that is four or more teeth. In the long run, it saves time and takes a lot of guesswork out of the equation. I also use incisal reduction guides and facial reduction guides to ensure consistent results based off of the wax-up. A putty stent of the wax up also helps ensure great-looking temps. 

7. Desired Teeth Shapes and Smile Styles I use the LVI Smile Catalog to show our patients sample shapes and designs of teeth and smiles. Ultimately, we want to know: The LVI Smile Catalog shows 12 different styles with varying shapes of teeth. Our favorite is the “LVI Natural” Style with “Softened” canines. We also always ask the patient to show us some of their favorite social media influencers or celebrity smiles. 

8. Pay Attention to Gum Levels We use a soft tissue diode laser in almost all of our cases. You can ’t have good-looking veneers without having symmetrical gums. Even if the patient doesn ‘t show their gumline, we still try and take a few minutes to create some harmony with the gum line. 

9. Tissue Management and Clear Impressions I routinely use Traxodent® for tissue retraction and tissue management prior to final impressions and/or seating the final restorations. I’ll use Clear ViscoStat™ or a half and half mix of water and hydrogen peroxide to help with hemostasis while prepping and generally do a round or two of Clear ViscoStat™ before seating final restorations. For final impressions, I use Take 1™ Advanced™ Light Body Wash Fast set (orange) with a small tip around the margins and Take 1™ Advanced™ Medium/ Monophase Fast set (light blue) for the tray. I see fewer pulls and drags and a more consistent final impression with this combination. 

10. Visibility For doing multiple unit veneer cases, it’ s appealing to have consistent retraction and visibility. The OptraGate® retractor by Ivoclar is a game-changer. Once it is placed, it saves a lot of time. During the veneer prep and seat visit, the OptraGate® will be in place for 80-90% of the procedure. 

11. Level and Straight Smiles I use the Symmetry Stick Bite® (Clinician ’ s Choice) for marking the midline and eye line. If done correctly, this can help prevent canting or slanting in the final restorations. 

12. Understanding Color and Final Shades I use the Ivoclar® Prep (stump) Shade Guide and Bleach Shade Guide. Get comfortable with talking to patients about veneer shades. It’ s also vitally important to understand when to consider using a different ingot (base color translucency/ opacity) when completing cases. With Emax®, we ’ re usually choosing a BL1, BL2, or BL3 shade and most likely using a HT (high translucency) or MT (medium translucency ) ingot. My go-to is HT BL1 or MT BL2. Talking with your ceramist about how they build color, natural characteristics, and block out dark prep shades is really helpful. 

13. Great Looking Temps We mostly always use Luxatemp® Shade BL. This is a solid and greatlooking temporary material. When used with a putty stent based off a wax up, the temps should look amazing. Good looking temps alone can help you do more cases. 

14. Choose A Natural Looking Restorative Material Choosing your material is an essential part of your case. I’ ve used Ivoclar Emax® as my material of choice for porcelain veneers for years now. It is easy to work with while also being durable and natural-looking. 

15. Patient comfort Offering light oral sedation, nitrous oxide, and having a mounted TV with headphones for the patients to watch Netflix® have all been big “ wow ” factors. Making the extra effort to make patients feel more relaxed and comfortable goes a long way toward building confidence, earning trust, and helping patients commit to treatment plans. 

If you’re interested in learning more about our Video Veneer Course for Dentists visit https://drtejaspatel.podia.com

Follow us on Instagram @tejaspateldds Follow us on TikTok @drtejaspatel 

10 TIPS FOR DENTAL STUDENTS INTERESTED IN COSMETIC DENTISTRY

I have 20 years of experience doing cosmetic dentistry and have become one of the top cosmetic dentists in the United States. My team and I perform veneer procedures daily, and I personally complete over 150 – 200 veneer units each month. 

What many people don’t realize is that, although we make it look easy, it’s actually taken many years to dial in our systems for that to happen. If it looks like we are always doing a large number of cases, it’s because we are, by design, and it takes many orchestrated steps to build that machine. 

I consistently get asked about what advice I would give to dental students. Third and fourth year dental students who are aspiring cosmetic dentists usually ask what steps they should take to get to where we are. Here are some key takeaways and recommendations from those conversations. 

First, let’s review some things that helped me get where I am today. I graduated from the University of Texas Dental School in Houston in 2002. After graduating, I worked at a corporate dental office for about a year. I opened up my first dental office in an area called Lakeway, which is outside of central Austin. I continued to work at the corporate office part time while I was building my new practice. Looking back, I’d maybe have stayed at that corporate office for another year to build up my speed a bit more. This corporate office position was valuable because it allowed me to see a high volume of patients and improve my speed and efficiency. 

A key moment for me in my first year as a dentist was when I took a hands-on advanced aesthetics course (no longer offered) where we did a 10-unit upper smile makeover on a real patient. It was a game changer. From that course, I started to take over 100 hours of Continuing Education each year in all aspects of dentistry. Within my first few years out of dental school, I was taking courses on cosmetic dentistry, sedation dentistry, Invisalign®, implant dentistry, sleep apnea, soft tissue surgery, full arch and full mouth reconstruction, occlusion, and oral surgery. Each year, I’ve consistently invested on the average of $5,000 to $15,000 into taking Continuing Education Courses in the United States and abroad. And even to this day, I continue to take courses and am committed to being a lifelong learner. 

So, here are my 10 tips for dental students interested in cosmetic dentistry:

Clinical confidence

There are 3 main things to gain clinical confidence: Learning about the process, actually performing the process, and how to recover when things don’t go as planned. These are vital for your success and confidence. In order to become a successful cosmetic dentist, you have to put in the hours of doing the procedures you want to get known for—you’ll gain clinical confidence, hone your skills, and build a reputation.

Continuing education

Continuous learning and taking Continuing Education courses will be essential to your growth after dental school.

Treatment planning & diagnostic abilities

Part of the learning process is to see and plan as many cases as you can. If that means joining a corporate office for the first few years out of school, then it could be beneficial to do that. Not all cases are the same, and each patient is unique and individual in their goals, needs, and expectations.

Speed and efficiency

Improving your speed and efficiency are important as well. No one likes to be in the dental chair. You have to put in the hours and time working and practicing to become proficient. There are no shortcuts.

Patient & team communication

Being able to focus on the needs of your patient is so important to your success. Being able to communicate to your patients and team is vital. The most important part of communication is actually being able to listen to your patient and being present for them.

Cosmetic dental lab partnership

I’ve said this before. There is no way to do excellent cosmetic dentistry without using a high end cosmetic dental lab. Pay the higher fees; it will save you headaches and remakes. Start working with a great lab early in your career. I recommend Reliance Dental Designs and Williams Dental Lab.

Progress from single tooth to full mouth

Dental school prepares you for single tooth dentistry, but to become a cosmetic dentist, you have to understand full mouth concepts and be able to perform full mouth treatment plans and comprehensively complete the work needed. A smile makeover can consist of 10 upper teeth. You have to learn the mindset and understand the sequence of steps in order to be efficient with your chair time. Start small by doing 2-unit or 4-unit veneer cases, then move up to 8-unit veneer cases, then 10-unit veneer cases. Get comfortable with each step before moving on to the next.

Photography

Showing patients the smiles you’ve transformed and documenting your work is another important concept. Reviewing your own before and afters is like an athlete watching footage and replays of their game. See where you can improve what you’ve done. Use photography as a learning tool for yourself and for your patients. Get comfortable using a high-quality digital camera.

Smile design

Being able to communicate the changes that you can make to a smile is important. Understanding smile design and how the teeth and facial features are related is vital. Also, understanding soft tissue esthetics will enhance your results. You also have to be able to think about the patients end goal and your end goal for completing their treatment and how to deliver predictable results. Knowing how size, shape, and color all affect the outcome is important.

Patient comfort

Doing cosmetic dentistry and working on multiple teeth simultaneously means longer procedures for the patient. Understanding patient comfort is a priority. Local anesthesia principles and sedation dentistry protocols are helpful for smoother appointments. As mentioned above, no one likes being in the dental chair. Learn how to make patients comfortable during longer procedures.

So where should you start?

To be honest, if you’re wanting to learn cosmetic dentistry, veneers, and how we do what we do, I would start with my Veneer Masterclass. I created this course with younger dentists in mind. There is no cosmetic dental training in dental school, yet the demand for quality cosmetic dentistry is at an all-time high.

I’ve taken my 20 years’ experience of doing veneer procedures and all the things I’ve learned over those years and put it into this course. With my Veneer Masterclass, I am now teaching and sharing the same techniques that have helped me complete thousands of smile makeovers. These are the exact and specific steps that I follow with each of my cases. There is not another comprehensive online course on veneers like this taught by a top and trending cosmetic dentist who is doing veneers in today’s environment. 

Visit
to learn more about our courses and to start your cosmetic dentistry journey.

REDUCTION GUIDES FOR PORCELAIN VENEERS PREPARATION

Almost every porcelain veneer case we use a reduction guide.  I generally have an incisal reduction guide and a facial reduction guide.  Especially for minimal prep veneer cases, this is essential.  The reduction guides are based off and made from a diagnostic wax up from our laboratory.  We use Reliance Dental Lab and Williams Dental Lab (both located in California), routinely for our waxups.  The reduction guides help to ensure that there will be adequate thickness of porcelain as your final restoration.
As you can see in the photos, we try to ensure a uniform thickness or equal space or reduction for each tooth for the future final restoration. 
If you’re interested in learning more about our smile makeover courses visit https://drtejaspatel.podia.com

SUMMARY OF STEPS DURING THE PORCELAIN VENEER PROCESS

Here are some slides of the steps during the porcelain veneers preparation appointment and the porcelain veneers seat appointment. If you’re interested in learning more about our cosmetic dentistry training courses visit https://drtejaspatel.podia.com

WHAT I WISH I HAD KNOWN IN MY FIRST 5 YEARS AS A COSMETIC DENTIST

Over the past 20 years, I’ve started a practice from scratch, acquired a practice, bought and merged another practice, sold a practice, was on 6 insurance plans, have had up to 2 locations and 12 team members and associates work for me, and much more. Today, I’m living my vision. My team and I have a fee-for-service destination practice that focuses exclusively on cosmetic dentistry.

Along the way, I’ve learned a lot of lessons about following your own path to success as a dentist. I’ve learned many of these lessons the hard way: trial and error. As I look back at the journey I took to get where I am today, I realize that there are some things I wish I had known when I started.

So, what are they? I’m glad you asked!

Invest in Yourself

Your physical and mental health are paramount to your success in your career. Make sure you give yourself the gift of time to become your best self. Additionally, learn about the business of dentistry as early as possible. After all of the clinical training, it can be a shock to realize that you also need to know how to run your own business. I wish I learned more about running a business, numbers, and profitability before starting my own business. I struggled early on with decision-making, and if I had had a stronger understanding of business, I ultimately could have saved myself a lot of stress and money.

Look for mentors or find a business coach who can help you achieve your goals. But it’s not all business, of course. In addition to learning about the business of running a dental practice, take as many clinical courses as you can to help build your confidence in doing procedures and to improve and widen your skill set. Learn about sedation dentistry, Invisalign®, dental implants, and cosmetic dentistry. In short, learn about procedures that patients really want.

Prioritize your health and wellbeing, focus on being a perpetual learner, and stay true to who you are. You and your practice are worth the investment.

Build your brand authentically

Build your brand and tell your story. With social media, you have the ability to to showcase your personality and your talents to a wide audience. Build your personal brand and put the effort into growing it on social media. This is your chance to show the world who you really are, carve out your own niche in the world, and invest in the truest version of you and your vision. Put the time in here, be patient, and be consistent in posting content and sharing your story. Authenticity breeds success. Ultimately, this is one of the best ways to get where you want to be.

Clarify your vision

I wish I had stayed truer to the path I wanted to be on instead of getting distracted by the path I thought I needed to be on. That’s why I took so many turns on my journey. I am guilty of having chased all the shiny objects and getting distracted from my true vision. For instance, there were definitely some big purchases I regret, like a CEREC® machine and some costly marketing strategies.

Before committing to some of these big purchases, I wish I taken a step back and took the time to evaluate whether these things would actually get me closer to my vision and my ideal practice. Every piece of technology and marketing idea sounds like it’s going to transform your practice, but you should always step back and question whether it’s really necessary. Not everything is right for everyone.

The truth is this: not everyone has it figured out. Everyone, even the biggest dentists, have struggles and insecurities. We’re all human. Having a clear understanding of your vision will help you stay on track to get where you want to go, be who you want to be, and practice the way you want to practice.

Invest in your team

I wish I had taken more time hiring and building my team. Having the right people and building the right team has taken years. Now I have a team of rockstars, but it took me a lot of time to recruit the right people. Frankly, I wouldn’t be able to have achieved the success I have today without them.

Take time and care when building your team. You’ll likely encounter hiccups, but once we got the right people, we grew exponentially. With the right people, your growth can be exponential too. The best way to grow your business is to find the right people to surround yourself with who share in your vision. Your team is the foundation of your business success.

Communication is key

Communication is vital in every aspect of our lives. How we speak to others, how we interpret what others are saying to us, and how we speak to ourselves ultimately shapes our reality.

To be a great leader you have to be able to communicate clearly with your team. You team must clearly understand you, and you must effectively listen to your team. To take care of your patients and to do more cases, you have to be a great listener in order to understand them and what they want and to be able to clearly and effectively communicate your recommendations and expectations. Your success hinges on your ability to communicate with everyone around you.

Learn to be a great communicator. Have hard conversations. Learn how other people communicate, how not to take things personally, and how to set clear expectations and boundaries.

I hope you are able to reach your goals in half the time that you think it’ll take!

Thank you!

If you’re interested in learning more about our upcoming veneer and social media courses visit https://drtejaspatel.podia.com

REVIEW OF SHADE SELECTION AND EXAMPLE OF BLEACH SHADES OF PORCELAIN VENEERS

Here are a few slides of Bleach Shade choices to compare a few popular styles/ colors of porcelain veneers. The shade guide seen in the images is the Ivoclar Bleach Shade Guide.  

If you’re interested in learning more about our online veneer course visit https://drtejaspatel.podia.com

The Rise of Cosmetic Dentistry, Social Media, And Video Content 

Let’s review some important statistics about the size of the market for cosmetic dentistry, social media usage, and video content.  


The US Cosmetic Dentistry market size was valued at $3.9 billion in 2023 and is expected to reach $8.4 billion by 2033.  

We will see the amount spent on cosmetic dentistry to double in ten years.  


In 2024, in the United States, there are 239 million active social media users.

Here’s a list of the most used social media sites ranked from highest to lowest in active users.

1.Facebook  2.Instagram  3.TikTok  4.Snapchat  5.Pinterest  6. X (Twitter)

The average amount of time that people in the US spend on social media is 

2 hours per day. 

Studies show that 95% of viewers retain a message when consumed through video content, compared to a 10% retention rate for text based content. 

72% of people expressed a preference for watching  a video to learn about products or services that they are interested in.  


Social media usage, video content consumption, and the market for cosmetic dentistry are all trending upwards.  


Smile Design– How to determine the Size of the teeth? 

Once we determine the size of the centrals that is used to determine the size of the adjacent teeth.  The centrals set the tone for the smile. 

Here are the steps I follow to pick the size of the teeth or the centrals. 

First, I look at the preop length vs how much of the central incisors they show at rest, while speaking, and when smiling.  

Photos and videos of the patient talking and smiling are helpful here.  

I always measure the preop centrals as reference.  Then based on how much the patient shows or doesn’t show I determine the desired length of centrals.  Or if we like the length of the centrals or one of the centrals we make a note of that.  

Here are some thoughts that help guide me:

  • Does the patient show enough of their centrals Versus  do they wish they showed more? 

  • Which tooth is closest to the right size and position?  

  • How long is too long? How short is too short? 

  • When the patient says “M” do they show any of the incisal edges?  When they say “M” this shows the lips resting position.

The average length of centrals that we choose for waxups or the final porcelain is 9mm to 11mm.

Remember we talked about women showing  2-3mm of incisal edge when the lip is at rest, while men show 1-2 mm of their incisal edges at rest. 

Another aspect of the sizing is how do we frame the smile with the lips and when the patient is smiling?  We don’t always have to cover the lower teeth by 100%

When determining the size of the centrals, I like to consider the height of the patient and the existing size of the teeth. Again, that way it still looks like that person's teeth, just better or more youthful. 


WHAT ARE VENEERS & HOW ARE THEY USED? 

If you're starting with veneers, it’s helpful to know what veneers are and what you can do with veneers.


What are veneers ?

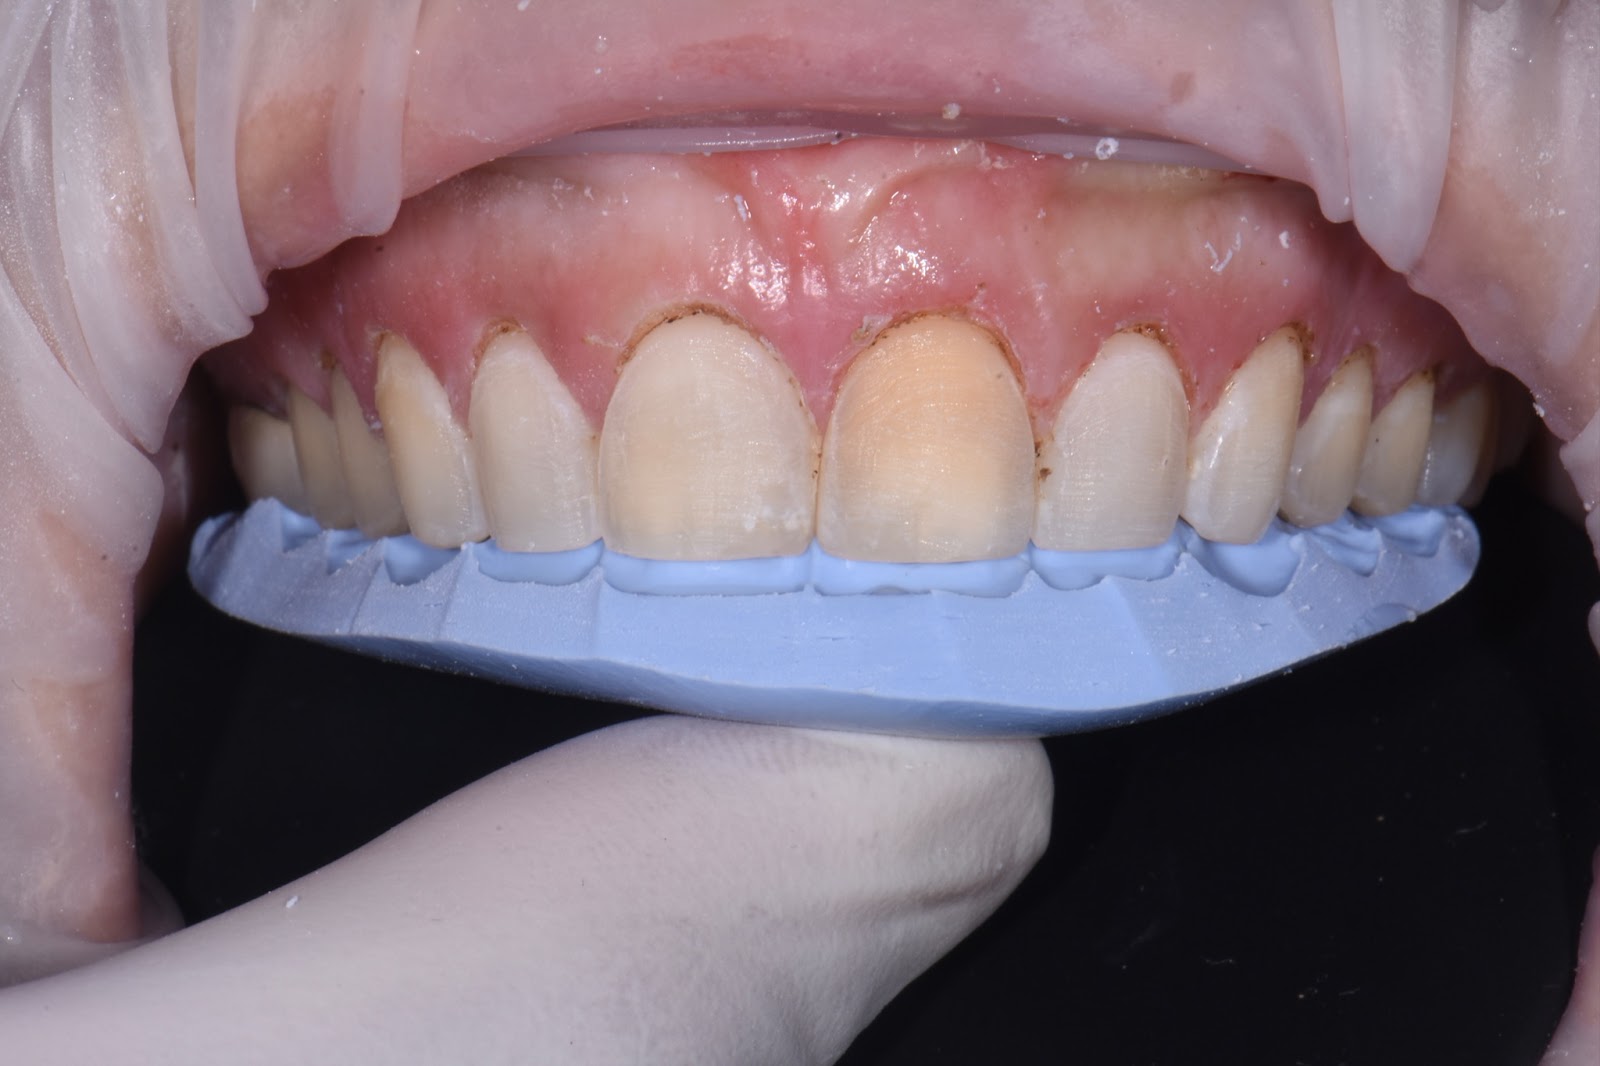
Veneers are thin shells of porcelain that are permanently bonded to the front surfaces and edges of the teeth to improve the color, shape, size, alignment, and symmetry of the teeth.


What are veneers used for?

Veneers are used to improve a person's smile.


How are veneers done?

Veneers are planned, prepared, designed, installed, and maintained by a Dentist.


Who makes the veneers?

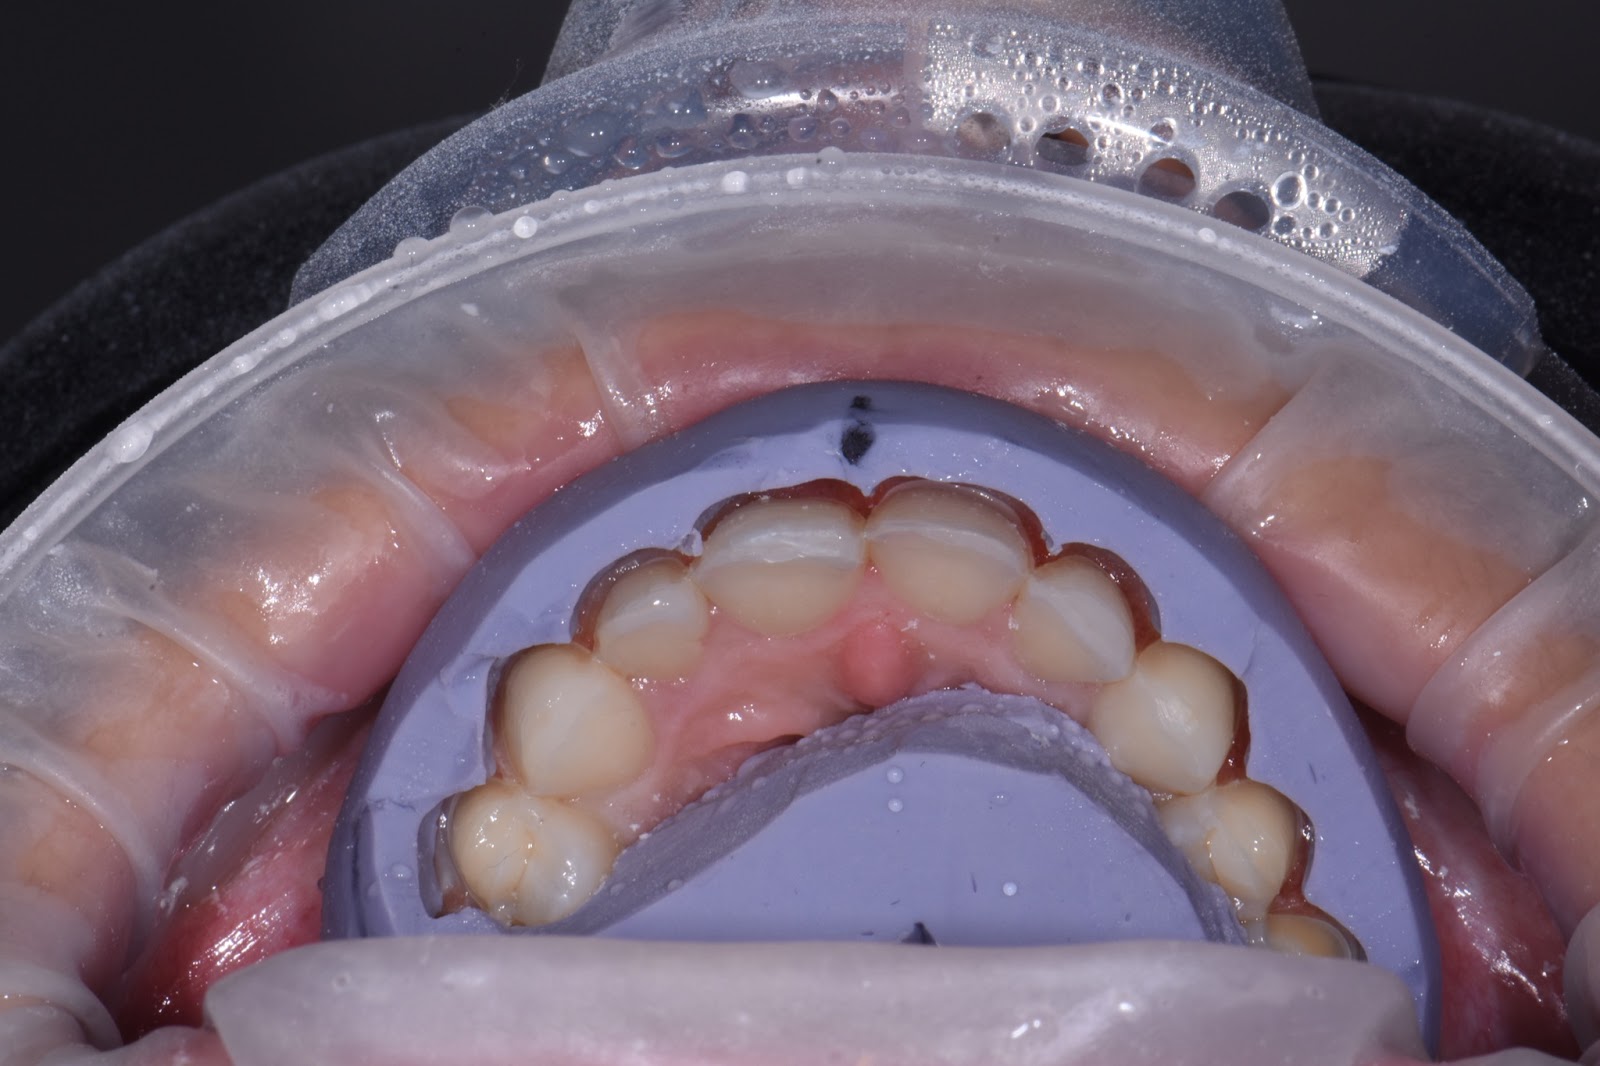
Veneers are fabricated in a dental laboratory by a Ceramist or Dental technician.


How are veneers made? 

Veneers are either milled out of a block, pressed into a mold, or layered by hand…or a combination of these techniques.   


What are veneers made out of?

The most popular veneers are made out of feldspathic porcelain or lithium disilicate


Patient Perspective: Cosmetic Dentistry And Social Media

Here’s some insights I’ve gained when talking to patients in my office about social media and how they found us and what they liked about our page or content. 

Patients  do a deep dive and research providers, products,  and services that they’re interested in.   Patients don’t just look at one thing they look at all the things and as they say “stalk you”. 

It’s common for a patient to hear your name from a friend, find you on Google, look at your website, then look at your Instagram, then read all your reviews, and research online to find all the content and videos that there is about you.  

They may do all of this before they even reach out to contact you.  

Here’s what my patients have said:

“I’ve been following you for years”

“I love that you were transparent”

“You showed everything about the process”

“I feel like I found out everything I needed to know before I reached out to you”

Social media has helped us stop “selling” dentistry and helped our patients understand the services we offer.

The goal of social media is to have a genuine audience and community that comes to your social media page because they feel like they know you, they like you, and trust you.


Past versions of No Prep Porcelain Veneers and Prepless Porcelain Veneers

No Prep veneers have been around in the form of indirect Lumineers and direct composite veneers over the years. Lumineers were a No Prep Veneer launched to the public that gained popularity by DenMat starting in 2004. Lumineers were less durable and less esthetic. They were marketed as “less invasive, potentially reversible, and less expensive than traditional porcelain veneers.” The biggest downside to the average consumer when comparing Traditional porcelain veneers to lumineers is that traditional veneers were more invasive and require more enamel or tooth structure to be removed. So the biggest advantage of Lumieneers was that it was less invasive. The biggest advantage of traditional porcelain veneers over Lumineers is that traditional porcelain veneers last longer, are more durable, and look more natural. With the advancements in technology and dental materials, we are now able to offer long lasting porcelain that is esthetic, is durable, lasts long, and can be made much thinner compared to years prior. So today, No Prep and Prepless Porcelain Veneers bridge the gap between older traditional porcelain veneers and Lumineers by utilizing the best of both worlds. The future of dentistry is moving towards more non-invasive treatments. Patients are wanting better smiles and also want to preserve their natural teeth. This is why it’s so important to understand and be able to offer no prep and prepless veneers predictably. If you’re a Dentist and want to learn how to do veneers, check out https://drtejaspatel.podia.com/ to find out more about my Veneer Courses. In my Veneer Blueprint Course we review: How to do porcelain veneers, treatment planning, case selection, case presentation, labs, material selection, veneer reduction requirements, veneers and occlusion, smile design, veneer preparation steps and sequence, recommended burs, no prep veneers, prepless veneers, minimal prep veneers, live video of veneer preparation, veneer temporization and veneer cementation, dealing with complications and troubleshooting, laminate veneer cases from a to z, case reviews, marketing, dental photography, and so much more!

Difference between No Prep Veneers, Prepless Veneers and Minimal Prep Veneers

So what are the differences between prepless and minimal prep veneers? With Prepless Porcelain Veneers, there is only minor enamel shaping, contouring, buffing, or very limited shaving. Most often this is used to reduce the facial thickness or bulkiness of specific teeth like the mid facial of the canines and the distal facials of the centrals. This contouring is limited to the enamel layer. Minimal prep veneers means that we are actually drawing a margin INTO the tooth with a bur and using a bur to create an artificial finish line in the enamel. Generally, with minimal prep veneers we want 0.5mm of incisal space or reduction and 0.3mm of facial space or reduction. With No Prep and Prepless veneers the margin and finish line is created over the existing tooth structure. If you’re a Dentist and want to learn how to do veneers, check out https://drtejaspatel.podia.com/ to find out more about my Veneer Courses. In my Veneer Blueprint Course we review: How to do porcelain veneers, treatment planning, case selection, case presentation, labs, material selection, veneer reduction requirements, veneers and occlusion, smile design, veneer preparation steps and sequence, recommended burs, no prep veneers, prepless veneers, minimal prep veneers, live video of veneer preparation, veneer temporization and veneer cementation, dealing with complications and troubleshooting, laminate veneer cases from a to z, case reviews, marketing, dental photography, and so much more!

10 tips to get started with no prep veneers and prepless veneers:

1. Use a Digital scanner for a digital workflow 2. Use a Digital camera to take high quality photos of your work to help market your services 3. Understand Smile design to give your patients a smile they will love 4. Understand minimal prep and traditional prep porcelain veneers, so you know when to prep vs not prep 5. Understand how occlusion and function impact your veneers to ensure long lasting results 6. Use a High Quality temp material for Mockups to help show your patients a preview of their new smile design 7. Use a Solid Bonding Protocol to ensure long lasting results 8. Choose a High Quality lab that specializes in No Prep porcelain veneers to work with 9. Use a Soft tissue laser for gum contouring to improve the soft tissues esthetics 10. Use an iPhone for Photos and videos to get content for your cases If you’re a Dentist and want to learn how to do veneers, check out https://drtejaspatel.podia.com/ to find out more about my Veneer Courses. In my Veneer Blueprint Course we review: How to do porcelain veneers, treatment planning, case selection, case presentation, labs, material selection, veneer reduction requirements, veneers and occlusion, smile design, veneer preparation steps and sequence, recommended burs, no prep veneers, prepless veneers, minimal prep veneers, live video of veneer preparation, veneer temporization and veneer cementation, dealing with complications and troubleshooting, laminate veneer cases from a to z, case reviews, marketing, dental photography, and so much more!